
From choosing a plan to your first FBR-compliant invoice
Onboarding is guided, not self-serve — our team handles the FBR integration for you. Here's exactly what happens, step by step.
Our Onboarding Process
Choose your plan
Pick Monthly, 6-Month, or Yearly based on your business needs — see full pricing details on our Pricing page.
Contact us on WhatsApp
Message our team to confirm your plan and get started — every "Get Started" button on this site opens WhatsApp directly with your plan pre-filled.
Complete payment
Pay via bank transfer, JazzCash, or Easypaisa for your chosen plan.
Share your FBR IRIS details
Send us the information we need to complete your FBR integration securely over WhatsApp.
What we'll ask for:
- FBR IRIS User ID
- FBR IRIS Password
- Business email
- Phone number
- Full name
- Business name
- Static IP address
Get your login and start invoicing
We complete your FBR integration and register your business on our platform, fbr.atsolhive.com. You'll receive your own User ID and Password — log in and start creating FBR-compliant invoices right away.
What using fbr.atsolhive.com looks like
The screenshots below are the actual platform your business will log into once onboarding is complete.
See the real product, step by step
These are actual screenshots of fbr.atsolhive.com — no mockups. Click through each step below.
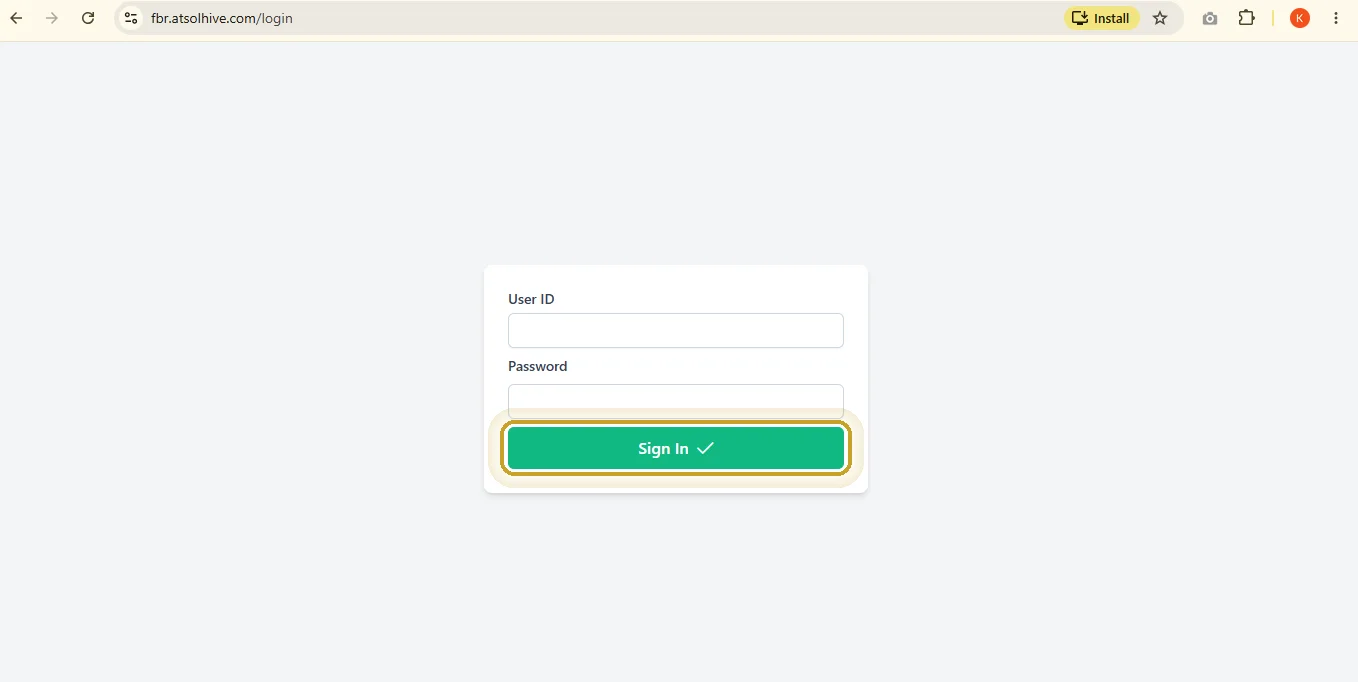
Step 1 — Login
The login page opens. You enter your User ID and Password, and click "Sign In."
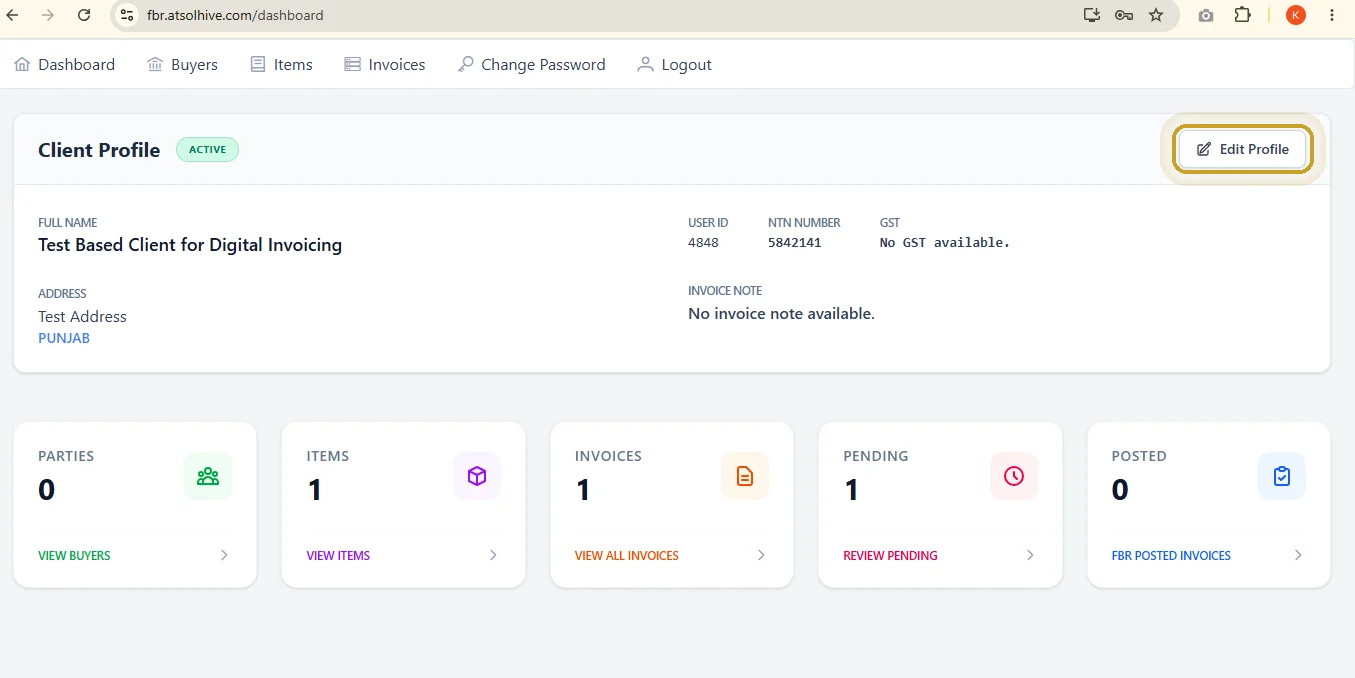
Step 2 — Dashboard
After login, the dashboard opens showing your Client Profile (Full Name, User ID, NTN Number, GST, Address) at a glance, plus quick-summary cards for Parties, Items, Invoices, Pending, and Posted.
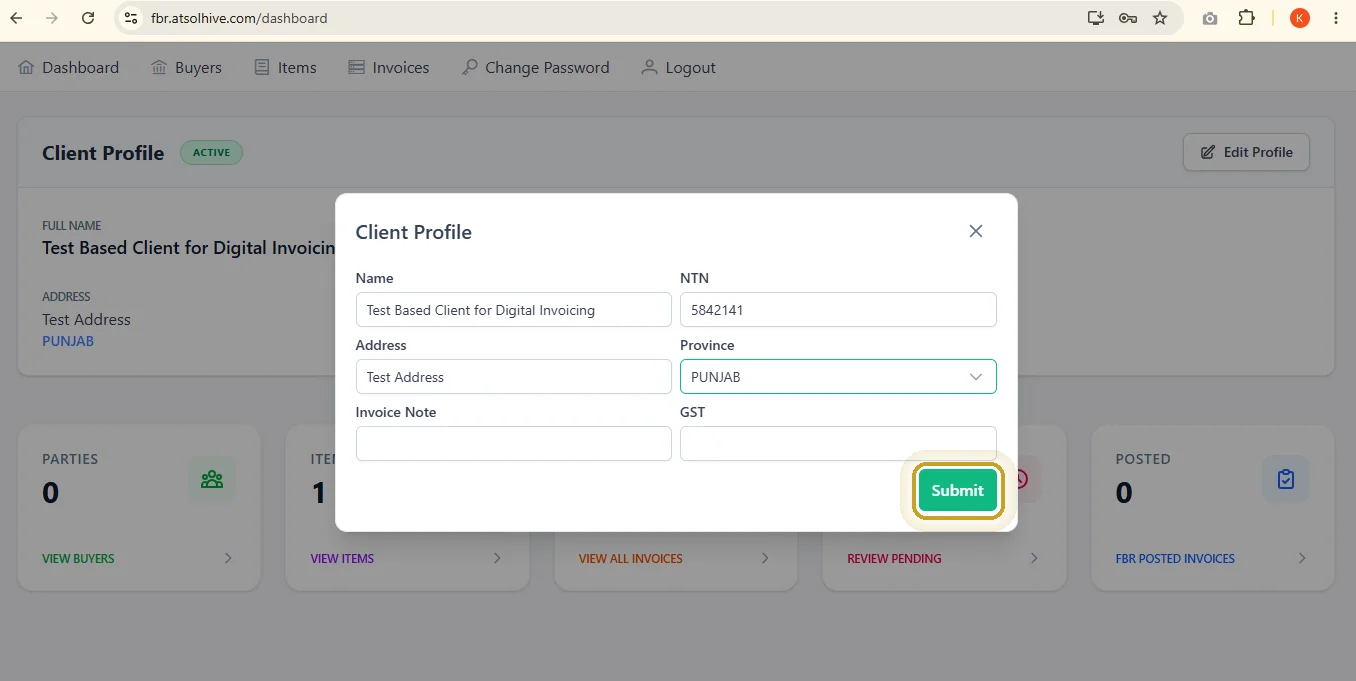
Step 3 — Edit Profile
Clicking "Edit Profile" opens a form where you can update Name, NTN, Address, Province, Invoice Note, and GST, then save with "Submit."
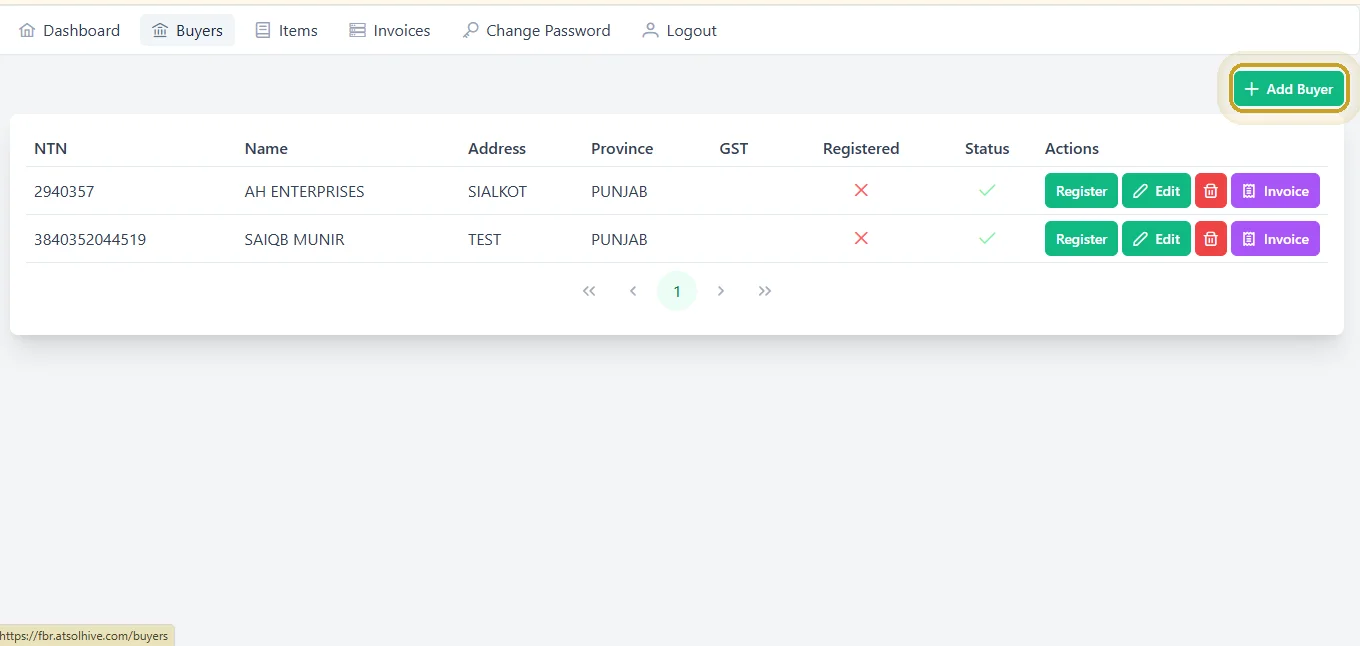
Step 4 — Buyers
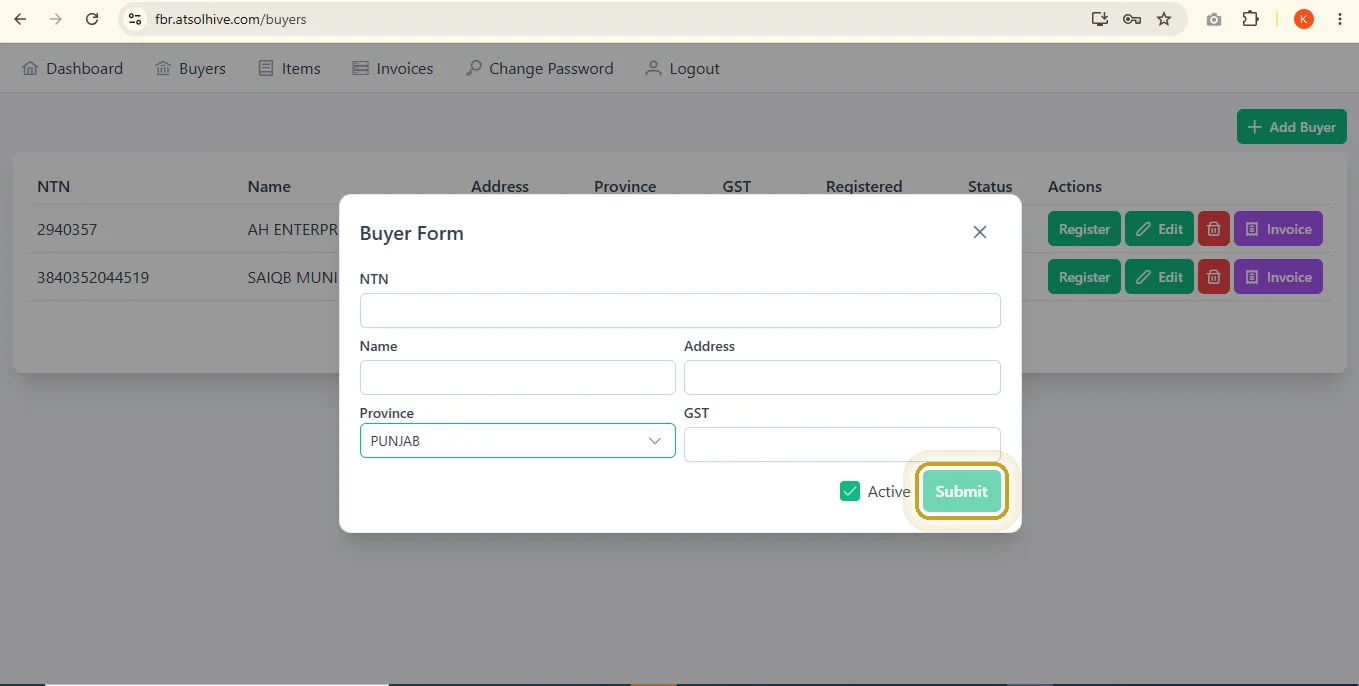
Clicking "Buyers" shows every registered buyer, with Register, Edit, Delete, and Invoice actions. Clicking "+ Add Buyer" opens a form to add a new one — NTN, Name, Address, Province, and GST — saved with "Submit."
Step 5 — Items
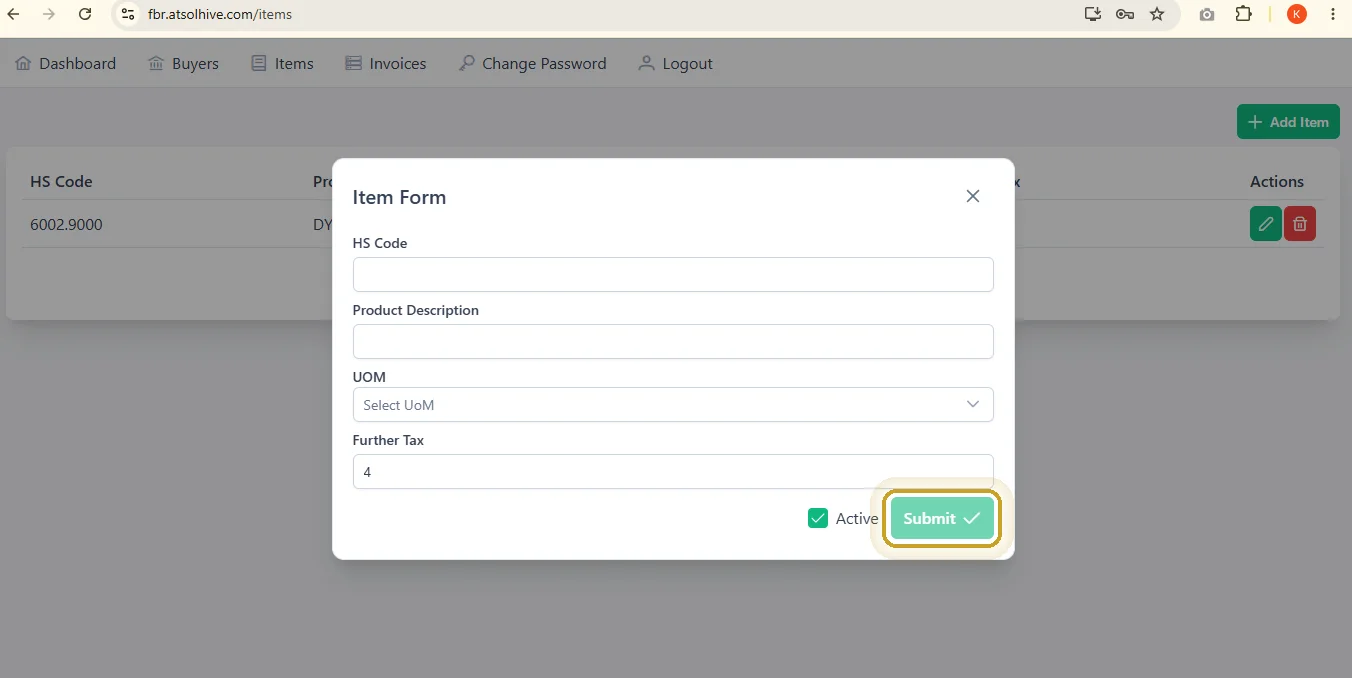
Clicking "Items" shows your item catalogue by HS Code. Clicking "+ Add Item" opens a form for HS Code, Product Description, UOM, and Further Tax — saved with "Submit."
Step 6 — Invoices
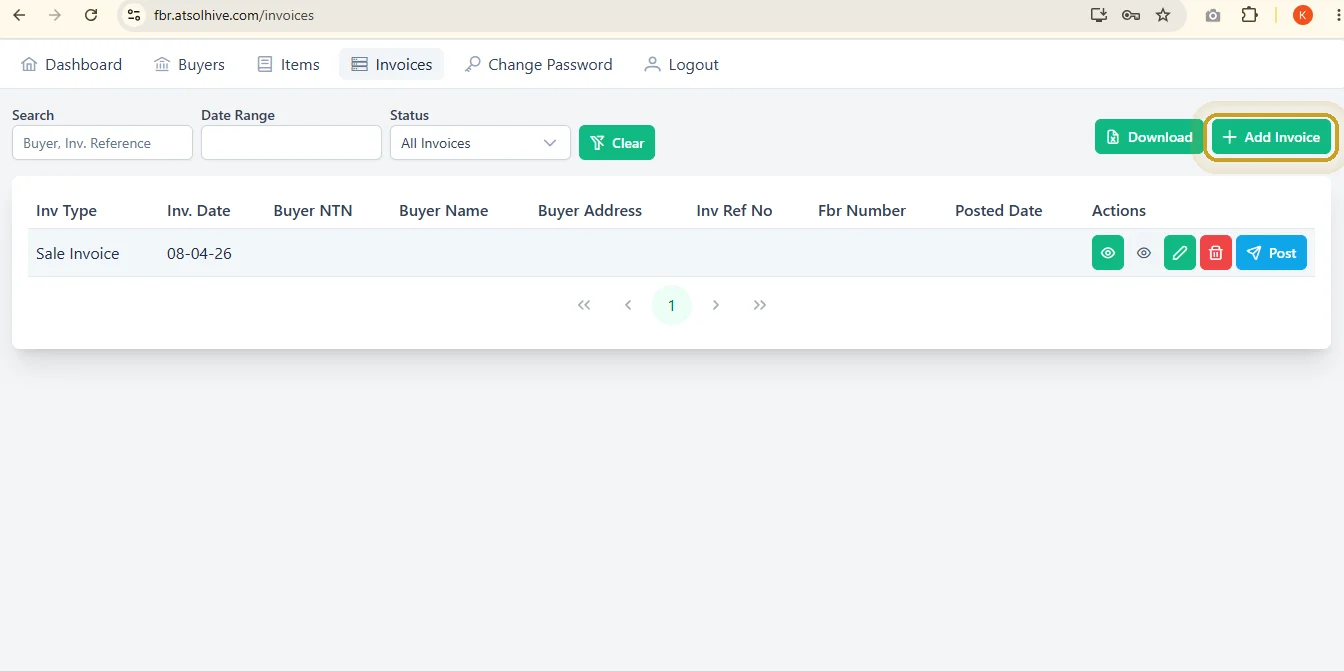
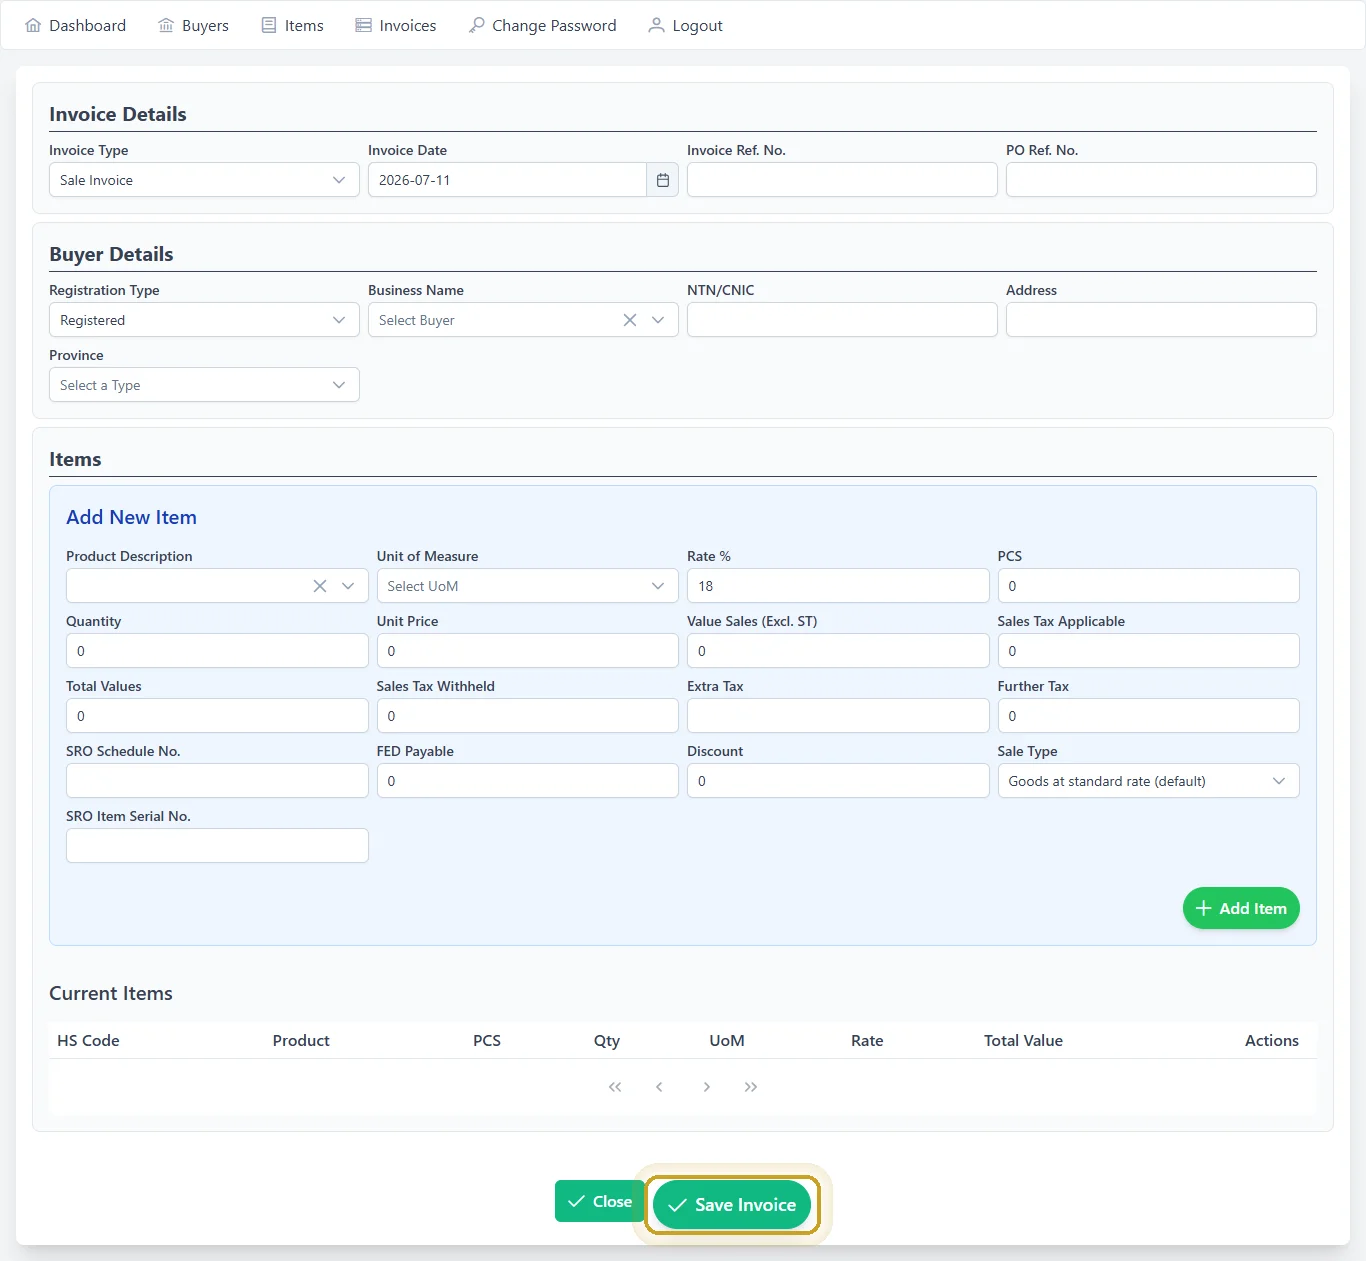
Clicking "Invoices" lists every invoice with search, date, and status filters — each one can be viewed, edited, deleted, or posted straight to FBR. Clicking "+ Add Invoice" opens a full form for Invoice Details, Buyer Details, and Items, saved with "Save Invoice."
Questions about getting started
Ready to get started?
Set up takes days, not months.